Todo를 구현하며 Backbone.js을 익혀봅니다.
들어가며
Backbone.js 튜토리얼1에서 말씀드렸듯 Todo 처럼 간단한 애플리케이션을 만들면서 동시에 개념을 확인하는 것이 학습에 효과적입니다.
마침 todoMVC에는 Backbone으로 Todo 애플리케이션을 구현한 예제가 있습니다, 간단한 애플리케이션이지만 바인딩, 모델 데이터의 지속성 유지, 라우팅, 그리고 템플릿 렌더링 같은 Backbone의 핵심 기능들을 확인할 수 있습니다.

본 튜토리얼은 이 todo 애플리케이션을 단계별로 구현하는 식으로 진행해보겠습니다. 이미 자바스크립트 프레임워크에 익숙하신 분들은 이 튜토리얼을 확인하실 필요 없이 그냥 todoMVC의 소스 코드를 주석과 함께 확인하는 식으로 학습이 가능하실 거에요 👍
ES6 문법을 세련되게 쓴 튜토리얼이 아닙니다. 단지 Backbone.js의 개념을 전달하기 위한 튜토리얼일 뿐이니 실제 프로젝트 구현하실 땐 모던 javascript 튜토리얼을 한번 참고하시길 권장드립니다.
#1 디렉토리 구조
tutorial_root 디렉토리를 생성하고, 그 안에 아래처럼 파일 트리를 만들어놓고 시작합시다. *.css, *.js, *.html 파일들은 튜토리얼을 진행하면서 내용을 채워넣으시면 됩니다.
tutorial_root
├── css
│   └── index.css
├── index.html
└── js
    ├── app.js
    ├── collections
    │   └── todos.js
    ├── models
    │   └── todo.js
    ├── routers
    │   └── router.js
    └── views
        ├── app-view.js
        └── todo-view.js

6 directories, 8 files
todoMVC 소스코드에는 jQuery나 underscore.js 같은 라이브러리 소스코드와 CSS 파일을 node_modules 디렉토리에 넣어서 관리합니다. 하지만 좀 번거로운게 사실이라 우리는 자바스크립트 라이브러리 소스코드는 CDN으로 대체하고, CSS파일은 css 디렉토리에 넣어서 관리하겠습니다.
#2 정적 HTML, CSS 파일 구성
우선 tutorial_root/index.html 파일을 구성해보겠습니다.
1. 헤더와 스크립트 구성
<!doctype html>
<html lang="en" data-framework="backbonejs">
    <head>
        <meta charset="utf-8">
        <title>Backbone.js • TodoMVC</title>
        <link rel="stylesheet" href="css/index.css">
    </head>
    <body>
    <script src="https://cdnjs.cloudflare.com/ajax/libs/underscore.js/1.12.0/underscore-min.js"></script>
    <script src="https://cdnjs.cloudflare.com/ajax/libs/jquery/3.5.1/jquery.min.js"></script>
    <script src="https://cdnjs.cloudflare.com/ajax/libs/backbone.js/1.4.0/backbone-min.js"></script>
    <script src="https://cdnjs.cloudflare.com/ajax/libs/backbone-localstorage.js/1.1.16/backbone.localStorage-min.js"></script></script>
        <script src="js/models/todo.js"></script>
        <script src="js/collections/todos.js"></script>
        <script src="js/views/todo-view.js"></script>
        <script src="js/views/app-view.js"></script>
        <script src="js/routers/router.js"></script>
        <script src="js/app.js"></script>
    </body>
</html>
head 태그 안에서는 튜토리얼을 진행하며 작성할 css 파일을 불러오고, body 태그 안에서는 필요한 라이브러리들-underscore.js, jQuery, Backbone.js, Backbone-localStorage.js-과 역시 튜토리얼을 진행하며 작성할 파일들을 불러옵니다.
2. 애플리케이션 HTML
index.html의 body 태그 내에 본격적으로 애플리케이션을 위한 태그를 넣습니다. Addy Osmani씨에게 감사하는 의미에서 Addy씨의 깃헙 하이퍼링크를 그대로 삽입해둡니다 😀
...
<body>
    <!-- *** -->
      <!-- 추가 -->
    <!-- *** -->
        <section class="todoapp">
      <header class="header">
        <h1>todos</h1>
        <input
          class="new-todo"
          placeholder="What needs to be done?"
          autofocus
        />
      </header>
      <section class="main">
        <input class="toggle-all" id="toggle-all" type="checkbox" />
        <label for="toggle-all">Mark all as complete</label>
        <ul class="todo-list"></ul>
      </section>
      <footer class="footer"></footer>
    </section>
    <footer class="info">
      <p>Double-click to edit a todo</p>
      <p>Written by <a href="https://github.com/addyosmani">Addy Osmani</a></p>
      <p>Part of <a href="http://todomvc.com">TodoMVC</a></p>
    </footer>
    <!-- *** -->
      <!-- 추가 -->
    <!-- *** -->
    <script src="https://cdnjs.cloudflare.com/ajax/libs/underscore.js/1.12.0/underscore-min.js"></script>
...
3. 템플릿
이제 동적으로 HTML을 생성해주는 템플릿을 추가해봅시다.
우선 개별 Todo 항목을 표시해주기 위해서 사용될 #item-template를 아래처럼 추가해주세요.
...
            <p>Part of <a href="http://todomvc.com">TodoMVC</a></p>
    </footer>
    <!-- *** -->
      <!-- 추가 -->
    <!-- *** -->
    <script type="text/template" id="item-template">
      <div class="view">
          <input class="toggle" type="checkbox" <%= completed ? 'checked' : '' %>>
          <label><%- title %></label>
          <button class="destroy"></button>
      </div>
      <input class="edit" value="<%- title %>">
    </script>
    <!-- *** -->
      <!-- 추가 -->
    <!-- *** -->
    <script src="https://cdnjs.cloudflare.com/ajax/libs/underscore.js/1.12.0/underscore-min.js"></script>
...
위 코드에서 사용된 <%=, <%-와 같은 템플릿 태그들은 Underscore.js에 특화되어 있습니다.
그리고 푸터에 삽입할 #stats-template도 정의해봅시다. 저는 방금 정의한 #item-template 밑에 추가해줬습니다.
...
            <input class="edit" value="<%- title %>">
    </script>
    <!-- *** -->
      <!-- 추가 -->
    <!-- *** -->
    <script type="text/template" id="stats-template">
      <span class="todo-count"><strong><%= remaining %></strong> <%= remaining === 1 ? 'item' : 'items' %> left</span>
      <ul class="filters">
          <li>
              <a class="selected" href="#/">All</a>
          </li>
          <li>
              <a href="#/active">Active</a>
          </li>
          <li>
              <a href="#/completed">Completed</a>
          </li>
      </ul>
      <% if (completed) { %>
      <button class="clear-completed">Clear completed</button>
      <% } %>
    </script>
    <!-- *** -->
      <!-- 추가 -->
    <!-- *** -->
...
    <script src="https://cdnjs.cloudflare.com/ajax/libs/underscore.js/1.12.0/underscore-min.js"></script>
4. CSS 파일
이제 tutorial_root/css/index.css 파일에 아래 내용을 복붙해주고 넘어갑시다. 필수적인건 아닌데, 예쁜 Todo 애플리케이션을 보려면 필요합니다.
html,
body {
    margin: 0;
    padding: 0;
}

button {
    margin: 0;
    padding: 0;
    border: 0;
    background: none;
    font-size: 100%;
    vertical-align: baseline;
    font-family: inherit;
    font-weight: inherit;
    color: inherit;
    -webkit-appearance: none;
    appearance: none;
    -webkit-font-smoothing: antialiased;
    -moz-osx-font-smoothing: grayscale;
}

body {
    font: 14px 'Helvetica Neue', Helvetica, Arial, sans-serif;
    line-height: 1.4em;
    background: #f5f5f5;
    color: #4d4d4d;
    min-width: 230px;
    max-width: 550px;
    margin: 0 auto;
    -webkit-font-smoothing: antialiased;
    -moz-osx-font-smoothing: grayscale;
    font-weight: 300;
}

:focus {
    outline: 0;
}

.hidden {
    display: none;
}

.todoapp {
    background: #fff;
    margin: 130px 0 40px 0;
    position: relative;
    box-shadow: 0 2px 4px 0 rgba(0, 0, 0, 0.2),
                0 25px 50px 0 rgba(0, 0, 0, 0.1);
}

.todoapp input::-webkit-input-placeholder {
    font-style: italic;
    font-weight: 300;
    color: #e6e6e6;
}

.todoapp input::-moz-placeholder {
    font-style: italic;
    font-weight: 300;
    color: #e6e6e6;
}

.todoapp input::input-placeholder {
    font-style: italic;
    font-weight: 300;
    color: #e6e6e6;
}

.todoapp h1 {
    position: absolute;
    top: -155px;
    width: 100%;
    font-size: 100px;
    font-weight: 100;
    text-align: center;
    color: rgba(175, 47, 47, 0.15);
    -webkit-text-rendering: optimizeLegibility;
    -moz-text-rendering: optimizeLegibility;
    text-rendering: optimizeLegibility;
}

.new-todo,
.edit {
    position: relative;
    margin: 0;
    width: 100%;
    font-size: 24px;
    font-family: inherit;
    font-weight: inherit;
    line-height: 1.4em;
    border: 0;
    color: inherit;
    padding: 6px;
    border: 1px solid #999;
    box-shadow: inset 0 -1px 5px 0 rgba(0, 0, 0, 0.2);
    box-sizing: border-box;
    -webkit-font-smoothing: antialiased;
    -moz-osx-font-smoothing: grayscale;
}

.new-todo {
    padding: 16px 16px 16px 60px;
    border: none;
    background: rgba(0, 0, 0, 0.003);
    box-shadow: inset 0 -2px 1px rgba(0,0,0,0.03);
}

.main {
    position: relative;
    z-index: 2;
    border-top: 1px solid #e6e6e6;
}

.toggle-all {
    text-align: center;
    border: none; /* Mobile Safari */
    opacity: 0;
    position: absolute;
}

.toggle-all + label {
    width: 60px;
    height: 34px;
    font-size: 0;
    position: absolute;
    top: -52px;
    left: -13px;
    -webkit-transform: rotate(90deg);
    transform: rotate(90deg);
}

.toggle-all + label:before {
    content: '❯';
    font-size: 22px;
    color: #e6e6e6;
    padding: 10px 27px 10px 27px;
}

.toggle-all:checked + label:before {
    color: #737373;
}

.todo-list {
    margin: 0;
    padding: 0;
    list-style: none;
}

.todo-list li {
    position: relative;
    font-size: 24px;
    border-bottom: 1px solid #ededed;
}

.todo-list li:last-child {
    border-bottom: none;
}

.todo-list li.editing {
    border-bottom: none;
    padding: 0;
}

.todo-list li.editing .edit {
    display: block;
    width: 506px;
    padding: 12px 16px;
    margin: 0 0 0 43px;
}

.todo-list li.editing .view {
    display: none;
}

.todo-list li .toggle {
    text-align: center;
    width: 40px;
    /* auto, since non-WebKit browsers doesn't support input styling */
    height: auto;
    position: absolute;
    top: 0;
    bottom: 0;
    margin: auto 0;
    border: none; /* Mobile Safari */
    -webkit-appearance: none;
    appearance: none;
}

.todo-list li .toggle {
    opacity: 0;
}

.todo-list li .toggle + label {
    /*
        Firefox requires `#` to be escaped - https://bugzilla.mozilla.org/show_bug.cgi?id=922433
        IE and Edge requires *everything* to be escaped to render, so we do that instead of just the `#` - https://developer.microsoft.com/en-us/microsoft-edge/platform/issues/7157459/
    */
    background-image: url('data:image/svg+xml;utf8,%3Csvg%20xmlns%3D%22http%3A//www.w3.org/2000/svg%22%20width%3D%2240%22%20height%3D%2240%22%20viewBox%3D%22-10%20-18%20100%20135%22%3E%3Ccircle%20cx%3D%2250%22%20cy%3D%2250%22%20r%3D%2250%22%20fill%3D%22none%22%20stroke%3D%22%23ededed%22%20stroke-width%3D%223%22/%3E%3C/svg%3E');
    background-repeat: no-repeat;
    background-position: center left;
}

.todo-list li .toggle:checked + label {
    background-image: url('data:image/svg+xml;utf8,%3Csvg%20xmlns%3D%22http%3A//www.w3.org/2000/svg%22%20width%3D%2240%22%20height%3D%2240%22%20viewBox%3D%22-10%20-18%20100%20135%22%3E%3Ccircle%20cx%3D%2250%22%20cy%3D%2250%22%20r%3D%2250%22%20fill%3D%22none%22%20stroke%3D%22%23bddad5%22%20stroke-width%3D%223%22/%3E%3Cpath%20fill%3D%22%235dc2af%22%20d%3D%22M72%2025L42%2071%2027%2056l-4%204%2020%2020%2034-52z%22/%3E%3C/svg%3E');
}

.todo-list li label {
    word-break: break-all;
    padding: 15px 15px 15px 60px;
    display: block;
    line-height: 1.2;
    transition: color 0.4s;
}

.todo-list li.completed label {
    color: #d9d9d9;
    text-decoration: line-through;
}

.todo-list li .destroy {
    display: none;
    position: absolute;
    top: 0;
    right: 10px;
    bottom: 0;
    width: 40px;
    height: 40px;
    margin: auto 0;
    font-size: 30px;
    color: #cc9a9a;
    margin-bottom: 11px;
    transition: color 0.2s ease-out;
}

.todo-list li .destroy:hover {
    color: #af5b5e;
}

.todo-list li .destroy:after {
    content: '×';
}

.todo-list li:hover .destroy {
    display: block;
}

.todo-list li .edit {
    display: none;
}

.todo-list li.editing:last-child {
    margin-bottom: -1px;
}

.footer {
    color: #777;
    padding: 10px 15px;
    height: 20px;
    text-align: center;
    border-top: 1px solid #e6e6e6;
}

.footer:before {
    content: '';
    position: absolute;
    right: 0;
    bottom: 0;
    left: 0;
    height: 50px;
    overflow: hidden;
    box-shadow: 0 1px 1px rgba(0, 0, 0, 0.2),
                0 8px 0 -3px #f6f6f6,
                0 9px 1px -3px rgba(0, 0, 0, 0.2),
                0 16px 0 -6px #f6f6f6,
                0 17px 2px -6px rgba(0, 0, 0, 0.2);
}

.todo-count {
    float: left;
    text-align: left;
}

.todo-count strong {
    font-weight: 300;
}

.filters {
    margin: 0;
    padding: 0;
    list-style: none;
    position: absolute;
    right: 0;
    left: 0;
}

.filters li {
    display: inline;
}

.filters li a {
    color: inherit;
    margin: 3px;
    padding: 3px 7px;
    text-decoration: none;
    border: 1px solid transparent;
    border-radius: 3px;
}

.filters li a:hover {
    border-color: rgba(175, 47, 47, 0.1);
}

.filters li a.selected {
    border-color: rgba(175, 47, 47, 0.2);
}

.clear-completed,
html .clear-completed:active {
    float: right;
    position: relative;
    line-height: 20px;
    text-decoration: none;
    cursor: pointer;
}

.clear-completed:hover {
    text-decoration: underline;
}

.info {
    margin: 65px auto 0;
    color: #bfbfbf;
    font-size: 10px;
    text-shadow: 0 1px 0 rgba(255, 255, 255, 0.5);
    text-align: center;
}

.info p {
    line-height: 1;
}

.info a {
    color: inherit;
    text-decoration: none;
    font-weight: 400;
}

.info a:hover {
    text-decoration: underline;
}

/*
    Hack to remove background from Mobile Safari.
    Can't use it globally since it destroys checkboxes in Firefox
*/
@media screen and (-webkit-min-device-pixel-ratio:0) {
    .toggle-all,
    .todo-list li .toggle {
        background: none;
    }

    .todo-list li .toggle {
        height: 40px;
    }
}

@media (max-width: 430px) {
    .footer {
        height: 50px;
    }

    .filters {
        bottom: 10px;
    }
}
#3 Todo Model
Todo Model(이하 모델)은 심플하게 구성할 겁니다. Todo에 필요한 속성 두 개와 이를 조작하는 메서드를 정의해보겠습니다. 이후에 순서를 저장하기 위해 order 속성이 추가됩니다.
속성
- title: 제목
- completed: 완료여부
메서드
- toggle() : Todo 항목의 완료여부를 변경하고 저장
tutorial_root/js/models/todo.js 파일에 아래 내용을 넣어주세요.
var app = app || {};

app.Todo = Backbone.Model.extend({
  // defaults에 기본 속성을 정의합니다.
  defaults: {
    title: "",
    completed: false,
  },
  // 이 todo 항목의 'completed' 상태를 토글시킵니다.
  toggle: function () {
    this.save({
      completed: !this.get("completed"),
    });
  },
});
#4 Todo Collection
앞서 말씀드렸듯 컬렉션은 모델을 그룹화하는 데 사용됩니다.
tutorial_root/js/collections/todos.js 파일에 아래 내용을 넣어주세요.
var app = app || {};

var Todos = Backbone.Collection.extend({
  // 컬렉션의 모델을 참조
  model: app.Todo,

  //   "todo-backbone" 네임스페이스 아래 모든 todo 항목들을 저장합니다.
  //   Backbone localStorage 플러그인이 필요합니다.
  localStorage: new Backbone.LocalStorage("todos-backbone"),

  // 완료된 모든 todo 항목들을 추려냅니다.
  completed: function () {
    return this.where({ completed: true });
  },

  // 완료되지 않은 todo 항목들의 목록만 추려냅니다.
  remaining: function () {
    return this.where({ completed: false });
  },

  // 데이터베이스 내에 특별한 순서 없이 저장이 되었다고 해도 순번을 유지할 수 있습니다.
  // 이를 위해 항목을 새로 생성하며 순번을 마지막 순번에서 1씩 증가시켜줍니다.
  nextOrder: function () {
    if (!this.length) {
      return 1;
    }
    return this.last().get("order") + 1;
  },

  // 이제 Todo는 삽입된 순서대로 정렬됩니다.
  comparator: function (todo) {
    return todo.get("order");
  },
});

// Todos 목록의 전역 컬렉션을 생성합니다.
app.Todos = new Todos();
참고1) 위에 쓰인 this.where, this.last는 Backbone 컬렉션에 혼합된 Underscore 메서드입니다. Backbone 공식문서에서 검색하시면 자세한 설명을 확인하실 수 있습니다.
app.Todos 이름으로 전역 컬렉션이 생성된 것을 기억해둡시다. 이어서 설명드릴 뷰에서 많이 쓰일 예정이에요 :)
참고2) 이 튜토리얼에서는 Todo 항목을 저장하여 데이터를 유지시키기 위해 backbone-localStorage 어댑터를 사용합니다. 이를 통해 HTML5의 localStorage에 데이터를 저장하죠. backbone-localStorage의 소스코드를 보면 Backbone.sync 메서드를 아래처럼 오버라이드합니다. 때문에 이어서 살펴볼 View에서 fetch 함수로 데이터를 주고 받을 때 자연스럽게 localStorage로 데이터를 주고 받을 수 있습니다.
// Override 'Backbone.sync' to default to localSync,
// the original 'Backbone.sync' is still available in 'Backbone.ajaxSync'
Backbone.sync = function(method, model, options) {
  return Backbone.getSyncMethod(model, options).apply(this, [method, model, options]);
};

return Backbone.LocalStorage;
}));
#5 애플리케이션 뷰
Backbone의 시작이자 끝이라는 뷰! 뷰에는 로직이 많이 들어있습니다. todoMVC에서는 뷰를 엘리먼트 컨트롤러 패턴을 사용해서 두 개의 뷰로 구성했어요. 하나는 Todo 항목의 컬렉션을 다루는 AppView, 또 다른 하나는 개별 Todo 항목을 다루는 개별 TodoView입니다.
1. AppView
AppView는 내용이 많아서 두 개의 섹션으로 나누어 설명합니다.
tutorial_root/js/views/app-view.js 파일에 아래 내용을 넣어줍니다.
var app = app || {};

// AppView는 UI의 최상단 컴포넌트
app.AppView = Backbone.View.extend({
  // 새로운 엘리먼트를 만드는 대신에 기존의 HTML에 존재하는 애플리케이션의 el에 바인딩!
  el: ".todoapp",
  // 애플리케이션의 하단에 통계 정보 출력란에 필요한 템플릿을
  // underscore에 정의된 _.template 메서드를 호출하여 구성합니다.
  statsTemplate: _.template($("#stats-template").html()),

  // initialize에서 'Todos' 컬렉션에 관련 이벤트를 바인딩합니다.
  initialize: function () {
    this.allCheckbox = this.$(".toggle-all")[0];
    this.$input = this.$(".new-todo");
    this.$footer = this.$(".footer");
    this.$main = this.$(".main");

    // add와 reset 두 개의 이벤트를 Todo 컬렉션에 바인딩.
    this.listenTo(app.Todos, "add", this.addOne);
    this.listenTo(app.Todos, "reset", this.addAll);
  },
  // 항목을 추가하기 위한 뷰를 생성해서
  // 목록에서 단일 todo 항목을 추가하고 뷰를 <ul> 태그에 덧붙입니다.
  addOne: function (todo) {
    var view = new app.TodoView({ model: todo });
        this.$list.append(view.render().el);
  },

  // Todos 컬렉션에 있는 모든 아이템을 한 번에 추가합니다.
  addAll: function () {
    this.$list.html("");
    app.Todos.each(this.addOne, this);
  },
});
underscore.js의 템플릿 메서드를 이용하여 문자열을 곧바로 html 요소로 만들어낼 수 있습니다.
listenTo() 메서드를 이용해서 바인딩하면 콜백 컨텍스트로 뷰를 설정하게 됩니다. 때문에 addAll() 메서드 내에서 this를 사용하여 뷰를 참조할 수 있게 되죠. 같은 기능을 on으로 구현하려면 세 번째 인자로 this를 넘겨줘야 합니다. on을 쓰고 뷰를 remove할 때 제대로 off 처리를 안 해주면 memory leak이 날 수 있으니 왠만하면 listenTo()로 구현합시다.
자 이제 나머지 코드도 추가해봅시다.
var app = app || {};

app.AppView = Backbone.View.extend({
  el: ".todoapp",
  statsTemplate: _.template($("#stats-template").html()),

  // *************
  //      추가1↓
  // *************
  // 새로운 아이템이 만들어질 때 발생하는 이벤트나 아이템이 완료되었을 때 발생하는 이벤트의 처리를 위임합니다.
  events: {
    "keypress .new-todo": "createOnEnter",
    "click .clear-completed": "clearCompleted",
    "click .toggle-all": "toggleAllComplete",
  },
  // *************
  //     추가1↑
  // *************
  initialize: function () {
    this.allCheckbox = this.$(".toggle-all")[0];
    this.$input = this.$(".new-todo");
    this.$footer = this.$(".footer");
    this.$main = this.$(".main");
    this.$list = this.$(".todo-list");    // 추가2

    this.listenTo(app.Todos, "add", this.addOne);
    this.listenTo(app.Todos, "reset", this.addAll);

    // *************
    //     추가3↓
    // *************
    // 이제 컬렉션 내의 모든 모델에서 완료여부 플래그가 변경되면 바로 청취할 수 있습니다.
      this.listenTo(app.Todos, "change:completed", this.filterOne);
    this.listenTo(app.Todos, "filter", this.filterAll);
    this.listenTo(app.Todos, "all", this.render);

    // localStorage에 이전에 저장된 Todo 모델을 가지고 옵니다.
    app.Todos.fetch({ reset: true });
    // *************
    //     추가3↑
    // *************
  },

  // *************
  //   추가4↓
  // *************
  // 통계 정보를 갱신하기 위해 애플리케이션을 다시 랜더링합니다.
  // 애플리케이션의 다른 부분은 갱신되지 않는 것이 포인트!
  render: function () {
    var completed = app.Todos.completed().length;
    var remaining = app.Todos.remaining().length;

    // 컬렉션의 Todo가 있는지 없는지에 따라서 #main과 #footer Region의 표시여부가 결정됩니다.
    if (app.Todos.length) {
      this.$main.show();
      this.$footer.show();

      // 아까 만들었던 statsTemplate 템플릿으로 HTML footer를 채웁니다.
      this.$footer.html(
        this.statsTemplate({
          completed: completed,
          remaining: remaining,
        })
      );

      this.$(".filters li a")
        .removeClass("selected")
        .filter('[href="#/' + (app.TodoFilter || "") + '"]')
        .addClass("selected");
    } else {
      this.$main.hide();
      this.$footer.hide();
    }

    // allCheckbox는 남아있는 Todo에 따라서 업데이트됩니다.
    this.allCheckbox.checked = !remaining;
  },
  // *************
  //    추가4↑
  // *************

  addOne: function (todo) {
    var view = new app.TodoView({ model: todo });
    this.$list.append(view.render().el);
  },

  addAll: function () {
    this.$list.html("");
    app.Todos.each(this.addOne, this);
  },

  // *************
  //     추가5↓
  // *************
 filterOne: function (todo) {
    todo.trigger("visible");
  },

  filterAll: function () {
    app.Todos.each(this.filterOne, this);
  },

  // 새로운 todo 항목을 위한 속성을 생성합니다.
  newAttributes: function () {
    return {
      title: this.$input.val().trim(),
      order: app.Todos.nextOrder(),
      completed: false,
    };
  },

  // input 필드에서 'return' 키를 누르면 새로운 Todo 모델을 만들어서 localStorage에 저장!
  createOnEnter: function (event) {
    if (event.which === ENTER_KEY && this.$input.val().trim()) {
      app.Todos.create(this.newAttributes());
      this.$input.val("");
    }
  },

  // 완료된 todo 목록을 삭제하고 모델도 삭제!
  clearCompleted: function () {
    _.invoke(app.Todos.completed(), "destroy");
    return false;
  },

  //  Todo 목록내의 모든 항목의 완료여부 체크박스를 토글시킨다.
  toggleAllComplete: function () {
    var completed = this.allCheckbox.checked;

    app.Todos.each(function (todo) {
      todo.save({
        completed: completed,
      });
    });
  },
  // *************
  //     추가5↑
  // *************
});
fetch할 때 {reset: true}를 인자로 넘겨주는 것에 주목합시다. 그럼 fetch 메서드로 default 값인 add 메서드 대신 reset 메서드에 의해 실행됩니다. 즉, Backbone이 fetch 메서드로 모델을 모두 가져오면 reset 이벤트를 발생하는 것이죠. 그리고 reset 이벤트의 리스너 함수인 addAll이 실행됩니다. 이를 통해 'add' 이벤트를 억제하고 모든 모델에 대해 app view가 다시 렌더링 되지 않도록 합니다.
_.invoke 같은 Underscore 메서드들도 바로바로 찾아가며 보시면 이해가 쉬우실거에요 :)
2. 개별 TodoView
이제 Todo가 편집되거나 작성되었을 때 뷰의 갱신을 보장해주는 개별 TodoView를 작성해봅시다. tutorial_root/js/views/todo-view.js 파일에 아래 내용을 넣어주세요.
var app = app || {};

(function ($) {
  "use strict";

  app.TodoView = Backbone.View.extend({
    // 목록을 나타내는 리스트 태그
    tagName: "li",

    // 단일 항목을 위한 템플릿 함수를 캐시해둡시다. 쉽게 말해 미리 컴파일 해서 저장해둔 것입니다.
    // 이후 뷰 요소의 컨텐츠를 대체할 수 있는 HTML을 반환할 거에요.
    template: _.template($("#item-template").html()),

    // Todo를 제어하는 DOM 이벤트
    events: {
      "dbclick label": "edit",
      "keypress .edit": "updateOnEnter",
      "blur .edit": "close",
    },

    // TodoView는 모델이나 렌더링의 변경을 감지하기 위해 리스닝하고 있습니다.
    // TodoView는 Todo 모델과 1:1로 매칭되게끔 구현할 것이므로
    // 굳이 컬렉션을 통하지 않고 모델을 직접 참조하도록 설정했습니다.
    initialize: function () {
      this.listenTo(this.model, "change", this.render);
    },

    // todo 항목의 제목을 렌더링합니다.
    render: function () {
      this.$el.html(this.template(this.model.toJSON()));
      this.$input = this.$(".edit");
      return this;
    },

    // "editing" 모드로 변경되었을 때 input 필드를 보여주고 포커스 이동합니다.
    edit: function () {
      this.$el.addClass("editing");
      this.$input.focus();
    },

    // 변경된 todo 항목을 저장하고 "editing" 모드에서 나옵니다.
    close: function () {
      var value = this.$input.val().trim();

      if (value) {
        this.model.save({ title: value });
      }

      this.$el.removeClass("editing");
    },

    // enter 누르면 편집을 중단!
    updateonEnter: function (e) {
      if (e.which === ENTER_KEY) {
        this.close();
      }
    },
  });
})(jQuery);
참고1) 지금까지와 달리 아래처럼 app.todoView 정의를 감싸주는 표현이 갑자기 등장했는데요, 이는 $을 다른 라이브러리와 충돌 없이 jQuery 객체와 엮어서 쓰기 위함입니다. 이 링크를 참고하세요.
(function ($) {
  "use strict";
   blabla..
 })(jQuery);
#6 app.js
이제 AppView와 TodoView를 만들었으니 index.html 페이지를 로딩할 때 AppView 객체를 만드는 함수로 앱을 시작하도록 해봅시다.
tutorial_root/js/app.js 파일에 아래 내용을 넣어주세요.
/*global $ */
/*jshint unused:false */
var app = app || {};
var ENTER_KEY = 13;
var ESC_KEY = 27;

$(function () {
  // kick things off by creating the `App`
  new app.AppView();
});
#7 중간 점검
여기까지 구현했으면 이제 잘 작동하는지 확인해봅시다.
tutorial_root 디렉토리에서 open 명령어로 index.html 파일을 열어봅시다.
open index.html아직 Todo 목록은 비어있을 것이고 추가/삭제도 제대로 안될거에요. 대신 브라우저 콘솔에서 새로운 todo 항목 추가가 가능한지 확인해보세요. 아래 구문을 입력하시면 window.app.Todos.create() 는 컬렉션 메서드 Colleciton.create(attributes, [options])를 실행시킵니다.
// F12 누르고 ESC 누르면 나오는 console에 아래 내용을 입력
window.app.Todos.create({title: 'My first Todo item'});
그러면 아래처럼 Todo item이 추가됩니다.
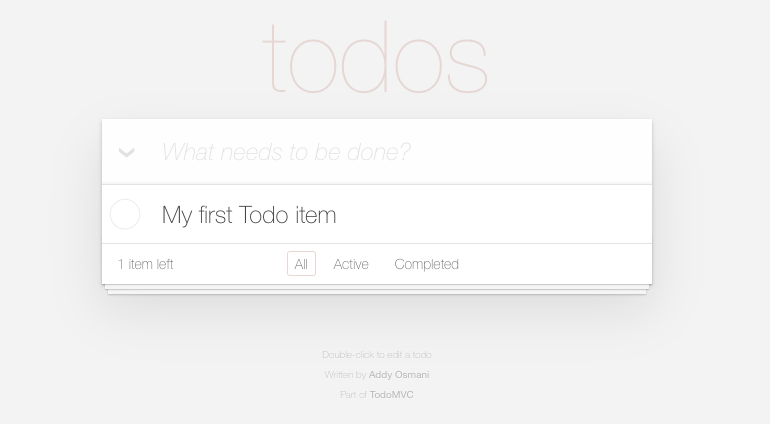
자, 이제 새로고침해도 Todo item이 남아있다면 잘 된 것입니다! 👏👏
이제 완료 기능과 삭제 기능을 붙여봅시다.
#8 완료와 삭제 기능
Todo 완료 기능과 삭제 기능은 개별 Todo 항목에 할당되기 때문에 `tutorial_root/views/todo-view.js에 추가해야 합니다. 모델을 변경하는 메서드를 추가하고 이벤트 해시로 DOM 이벤트와 엮어줍니다. 그리고 listenTo 메서드로 모델 변경에 따라 DOM 객체가 변경되도록 이벤트를 바인드합니다.
var app = app || {};

(function ($) {
  "use strict";

  app.TodoView = Backbone.View.extend({
    tagName: "li",

    template: _.template($("#item-template").html()),

    events: {
      "click .toggle": "togglecompleted", // 추가1
      "click .destroy": "clear", // 추가2
      "dbclick label": "edit",
      "keypress .edit": "updateOnEnter",
      "blur .edit": "close",
    },

    initialize: function () {
      this.listenTo(this.model, "change", this.render);
      this.listenTo(this.model, "destroy", this.remove); // 추가3
      this.listenTo(this.model, "visible", this.toggleVisible); // 추가4
    },

    render: function () {
      this.$el.html(this.template(this.model.toJSON()));

      this.$el.toggleClass("completed", this.model.get("completed")); // 추가5
      this.toggleVisible(); // 추가6

      this.$input = this.$(".edit");
      return this;
    },

    // **********
    //    추가7↓
    // **********
    // 이 함수를 이용해서 항목을 보여주거나 숨깁니다.
    toggleVisible: function () {
      this.$el.toggleClass("hidden", this.isHidden());
    },

    // 이 항목을 숨길 것인지 결정합니다.
    isHidden: function () {
      return this.model.get("completed")
        ? app.TodoFilter === "active"
        : app.TodoFilter === "completed";
    },

    // 항목의 상태를 "completed"로 변경합니다.
    togglecompleted: function () {
      this.model.toggle();
    },

    // 항목을 제거하고,localStorage에서 모델을 삭제하며 뷰를 제거합니다.
    clear: function () {
      this.model.destroy();
    },
    // **********
    //    추가7↑
    // **********
    edit: function () {
      this.$el.addClass("editing");
      this.$input.focus();
    },

    close: function () {
      var value = this.$input.val().trim();

      if (value) {
        this.model.save({ title: value });
      }

      this.$el.removeClass("editing");
    },

    updateonEnter: function (e) {
      if (e.which === ENTER_KEY) {
        this.close();
      }
    },
  });
})(jQuery);
#9 Todo 라우팅
자 이제 이 튜토리얼의 마지막입니다. 완료된 Todo 항목뿐만 아니라 활성화된 아이템의 목록도 쉽게 필터링해주는 라우팅을 추가해봅시다.
라우팅은 아래 세 경로를 지원할 거에요.
#/#/active/completed
tutorial_root/js/routers/router.js에 아래 내용을 넣어주세요.
var app = app || {};

var TodoRouter = Backbone.Router.extend({
  routes: {
    "*filter": "setFilter",
  },

  // URL의 #/ 뒤의 문자열이 setFilter() 함수의 인자로 전달됩니다.
  setFilter: function (param) {
    // 현재 사용되는 필터를 설정합니다.
    app.TodoFilter = param || "";

    // 컬렉션 필터 이벤트를 트리거 시켜서 Todo 항목을 숨기거나 드러냅니다.
    app.Todos.trigger("filter");
  },
});

// 라우터의 인스턴스를 생성하고 페이지가 로드될 동안 초기 페이지로 라우팅되도록 Backbone.histroy.start()를 호출합니다.
app.TodoRouter = new TodoRouter();
Backbone.history.start();
경로가 변경될 때 Todo 모델이 필터링되어 Todo 목록을 구성할 예정입니다. footer에 있는 버튼으로 필터를 활성화할 수 있습니다. 필터를 누를 때마다 URL이 계속 바뀌는 것을 확인해보세요. 활성화된 필터는 계속 다시 로드(load)되기 때문에 항목이 변경되면 활성화된 필터에 의해 Todo 목록도 자동으로 갱신됩니다.

마치며
이제 Backbone의 동작이 어느 정도 이해되셨을 겁니다. 하지만 실제 애플리케이션을 작성하려면 더 풀어야할 의문들이 많으실 거에요. 예를들어 제 경우 아직 프로젝트를 제대로 들어가지도 않았는데 아래 의문들이 생겼습니다 🤔
- Backbone 객체들을 전역객체에 넣어서 활용하면 편하긴 할텐데 전역객체를 쓰는데 거부감이 든다.. 보통 어떤 패턴으로 활용할까?
- 뷰 렌더링의 '좋은' 패턴은 무엇일까, 베스트 플랙티스는 없나?
- SPA를 구현해서 화면을 전환시킬 때, 기존 뷰 객체와 그 객체의 서브뷰, 그리고 이벤트들은 어떻게 처리되는걸까? 정녕 화면을 전환할 때마다 뷰 객체를 삭제하고 다시 만들어야하나? 오버로드가 생길텐데;;
이런 의문들은 프로젝트 진행하며 차차 풀어보고, 프로젝트 후기 글 등을 통해서 내용 남겨보겠습니다.
혹시 잘 작동하지 않거나 틀린 내용이 있다면 댓글 남겨주시면 감사하겠습니다. 긴 글 읽어주셔서 감사합니다~!
'Dev_articles > Frontend' 카테고리의 다른 글
| [Backbone js] 백본 튜토리얼1 - 개념잡기 (0) | 2021.01.14 |
|---|